Google Postmaster Tools is an amazing data source to add to any email marketers' toolkit. Once set up, Postmaster Tools allows marketers to track key deliverability metrics such as user spam reports and domain reputation across Gmail. Gmail users likely make up the majority of your mailing list if you are a US based sender, so this data can be a key gauge for how you're doing as a sender.
In this guide, we'll first help you set up Google Postmaster Tools, and then take a look at the different dashboards within Postmaster Tools and how to use them. Let's get to it!
How to Set up Google Postmaster Tools
Note: You need to have a Google account (Gmail address or Google Workspace) to use Postmaster Tools. If you don't have a Google account, you'll need to create one.
First, sign in to https://postmaster.google.com. If this is your first time opening Google Postmaster Tools, you'll be prompted with a welcome and get started pop-up. Otherwise, you can click the red plus sign button at the bottom right of the screen.

After selecting Get started, you will be asked to add your domain.

After entering your domain, click Next. It will prompt you to verify the ownership of your domain. You'll need to copy Google's generated string of text in the box labeled, “TXT record.”

Lastly, access your DNS record, and paste the TXT record provided by Google. This will open a new tab or browser window to go to your DNS provider and create the proper TXT record. If you have access to your DNS record, you can do this step yourself. Otherwise, you'll need to coordinate with your domain administrator or your IT team.
Once completed, go back to Google Postmaster Tools and select Verify to complete the setup.
If you have issues adding the TXT record, an alternative method for verification is adding a CNAME record.
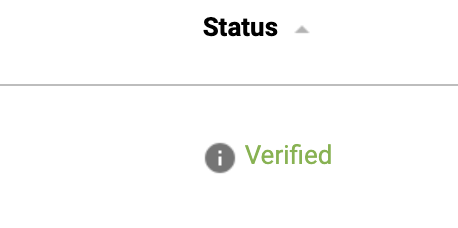
After verification, it may take some time before your domain’s verification status updates to “Verified.”
Once you’ve verified the ownership of the domain you'll have access to several different dashboards, each providing unique insights.

Understanding the dashboards
Google aggregates all data and generates reports daily, which means it takes 24 hours before insights are presented. If you send a low volume of email, you may receive reports less frequently or in some cases data may not show at all.
In our experience, you need to be sending email to 100-200 unique addresses on a single day for Google to populate your dashboards.
By default, the dashboards will show only the last 7 days of data. If you're not seeing data, try expanding your view to show "Last 120 days" as you may have data from previous months even if you haven't hit the threshold to get an update in the last 7 days.
Spam rate dashboard
The spam rate dashboard keeps track of the percentage of users reporting your emails as spam versus emails sent to the inbox for active users. Do note that based on Google’s new reporting methodology, you may see an artificially low spam rate if the majority of your emails are landing in spam. From Google:
“If a substantial number of emails are delivered directly to spam folders, you may see a low spam rate even though users may still be marking your inboxed emails as spam.”

IP reputation tracking
IP reputation plays an important role in email deliverability. A higher IP reputation means emails are more likely to go to subscribers’ inboxes instead of their spam folders.
For most smaller senders you’ll be on a shared IP address hosted by your marketing platform. If this is the case, no data will show on the IP Reputation dashboard. For most senders this is actually a good thing, as managing an IP reputation can create its own unique set of challenges.

Domain reputation
For senders on a shared IP, poor domain reputation is likely to be the culprit when deliverability issues are encountered. Fortunately, Gmail makes it easy to track domain reputation over time.

Gmail puts sending domains into 4 categories:
- Bad: Sending a high volume of spam mail. Mail coming from this entity almost always gets rejected or marked as spam.
- Low: Known to send a considerable volume of spam regularly, and mail from this sender will likely be marked as spam.
- Medium/Fair: Known to send good mail, but has occasionally sent a low volume of spam. Most of the emails from this entity will have a fair deliverability rate, except when there’s a notable increase in spam levels.
- High: Has a good track record of a very low spam rate, and complies with Gmail's sender guidelines. Mail will rarely be marked by the spam filter.
If you’ve made mistakes in the past and your domain reputation is not steller, don’t lose hope. If you take steps to improve your list hygiene and increase subscriber engagement, things can turn around quite quickly. You can read more about domain reputation and how to improve it in this article.
Feedback loop
The Feedback Loop is an advanced feature that high volume senders use to identify issues with their email campaigns or detect abuse.
Before you can make use of Gmail Spam Feedback Loop (FBL), you have to take the additional steps outlined here to set it up.
To protect user privacy, Gmail's FBL reports daily aggregated spam statistics per customer or per campaign. This means that it cannot be traced back to the email address of the recipient who made the complaint.

Message authentication
This dashboard tracks the rate of successfully authenticated emails sent based on DKIM, SPF, and DMARC protocols.
There are three key data points on the graph are:
- SPF success rate: Shows percentage of mail that passed SPF vs all mail from that domain that attempted SPF. This excludes any spoofed mail.
- DKIM success rate: Shows percentage of mail that passed DKIM vs all mail from that domain that attempted DKIM.
- DMARC success rate: Shows percentage of mail that passed DMARC alignment vs all mail received from the domain that passed either of SPF or DKIM.

Encryption
This dashboard tracks the percentage of inbound or outbound mail that has passed Transport Layer Security (TLS) compared to all mail coming from or being sent to your domain.
There are two types of graphs here:
- TLS Inbound: Shows percentage of incoming mail (to Gmail) that passed TLS vs all mail received from that domain.
- TLS Outbound: Shows percentage of outgoing mail (from Gmail) that was accepted over TLS vs all mail sent to that domain.

Delivery errors dashboard
This graph shows your delivery error rate. It tracks the percentage of messages that were either rejected or temporarily failed to deliver — complete with a reason why the failure occurred.

And that's it! We hope this has been a helpful guide to setting up and running your Google Postmaster Tools.
Want to learn more about email deliverability? Check out the video below, and Sign up for our monthly Everything Email Newsletter for more tools, tips, and tricks that will help you up your email game.
See what your email program could be doing.
Connect Seventh Sense to your HubSpot portal and watch the AI surface per-person engagement profiles, per-inbox-provider performance, and AI-driven optimization recommendations - within 24 hours.
Try it free →